Showing posts with label Cakes. Show all posts

Sunday, May 20, 2012

Girly Girl Cake

One of our friends asked for a girly girl cake for his niece.  I thought that was a wonderful gift for an uncle to give the family!  The cake is a homemade yellow cake, covered in swiss meringue buttercream and decorated with fondant/gum paste.  


Monday, November 28, 2011

Breast Cancer Awareness Raffle Cake

Daniel asked me to make a special cake for the raffle at the local theatre.  Since I had family coming in and two other cakes, it made for a crazy weekend. I do wish I had had more time to spend on this cake.  It was dedicated to my mother-in-love who survived breast cancer before I met her and to my husbands grandmother who recently beat it as well.


Sarah's Birthday Cake

If I ever get time to add more than a few pictures, I will post some of the birthday photos.  For the time being, I'll just add the picture of her cake. She wanted an Addams family cake.  I wasn't sure what to do until I saw a house made of royal icing.  Unfortunately, it did not make it to the cake and I had to scramble for an alternative.  This is not my best work, but she loved it and that is what counts.  The house is made of rice krispy treats and the cake is Sarah's favorite spice cake with cream cheese icing.

Ice Cream Party Birthday Cake


Chocolate and Vanilla cakes filled with vanilla butter cream and covered in fondant.  The ice cream, cupcake and candy are made of sugar cookies.

Tuesday, October 4, 2011

Tinker Bell Birthday Cake

A friend from our small group asked me to do a Tinkerbell cake for her daughter's birthday getaway.  It's chocolate cake with butter cream icing and covered in fondant.  I created a new chocolate cake recipe and think it's better than my old one. 

I love how this turned out!  I'll post addition pictures on my cake blog later.

Monday, August 22, 2011

Brenna and Emma's Birthday Cake

I hope to get time to post pictures of the party later, but for now here are the cake pictures.  The carriage was my most ambitious cake to date and I'm very pleased with how it turned out.  My wonderful daughter and my lovely niece loved the cake and that made it worth all the work!  And I want to send a big thanks to my husband for keeping the kids out of my hair while I worked on the cake! Love you babe!
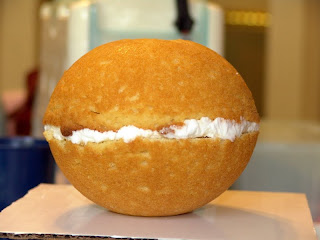
 First there was a ball of cake...
 And a fairy godmother came and turned it into this!
 The wheels were a little challenging. Thankfully they are for looks or this thing would only move in circles!

I wanted each girl to have their own cake. My niece just went to Disney and is in love with princess'. I also like to call Brenna my petite princess, so the theme was an easy one.  I found the pillow cakes online and the tiara fit in.  While doing research, I found this sweet little carriage and just had to make one! 


Friday, August 12, 2011

Happy Birthday Brenna!!

Wow! She's two.  It's hard to believe our tiny little girl is another year older!  My sister-in-law and I decided to do Brenna and Emma's (my niece) party together on Friday. But we had to push it out 'til next week.  Because of that, I had a partially finished cake (that was to be part of the larger cake) sitting on the dining room table.  I decided to finish that cake and do an at home party for Brenna.  It also gave me a trial run for the party cake!  Here's  few pictures of the little Miss!
My first Pillow cake.  I think it turned out pretty well!
Brenna loved it!  I also love their expressions in this pictures.  It's as though Ashton can't believe the cake is for Brenna and she's surprised it's hers.  After I grabbed this shot, Brenna leaned over and licked the cake. Thankfully it was hers to begin with!
The tiara was fun to make. I have another one made out of gum paste.  I broke a piece of of it and had to make a few last minute changes, but it still turned out cute!
The tiara is made out of royal icing and painted with edible metallic silver paint.  I sawed off the right portion of the tiara and stabilized the heart on top with a little more royal icing.
As you can see, she loved her cake! 
 And blowing out her two candles!
 I love how her little tongue always sticks out when she's accomplishing something. Daniel tells me that her great grandfather used to do the same thing when he was working!
She didn't wait to get a fork!
This is her new table set.  She's fascinated with the horse and the box!
 Mmm, cake!
 Sissy helping with her next present.
She loved her own personal TV radio and table set!

Friday, July 29, 2011

Dreaming of Oreo's

Mmmm.  I made this little beauty for dinner at a friends house. It's an Oreo Cream Pie with extra oreos and whipped cream on top!  Just follow the instructions off the back of the Jellow Instant Oreo Pudding box. I always add an extra teaspoon of vanilla to any pudding.  For the decorations, add 6-8 oreas to a food processor and blend until they are crumb sized.  Put them over the top and press into the pudding mixture to set.  Add whole oreos to the top.  Place whipped cream in a piping bag with a 1M large star tip.  You will not have any leftovers!

Wednesday, May 25, 2011

It's a Rainbow...Cake

Sarah had a cake walk at school this week and I decided it was time to try my hand at a rainbow cake. I've seen a few variations of this cake on different sites here is what I came up with.  I did have grander plans for the outside of the cake, but since I'm less than two weeks away from delivery, I decided to forgo fondant decorations.  Well, that and I still need practice on my butter cream piping techniques.  Overall, it was a fun cake to make and I think I'm going to try it again for Brenna's birthday in August.

Before the icing...
 Can you taste the rainbow?
 Little dots and simple swirl roses.


Cross posted at debssweetspot.blogspot.com.

Friday, April 22, 2011

Make Up Party Cake

This week I made a sweet little cake for a 6th birthday party.  I made a little makeup bag with some fondant decorations.  The cake was an interesting challenge.  I had intended it to sit up straight, but the filling inside kept causing the cake to pop open as I iced it.  Because of that, I decided to lay it down on it's side.  As I was working on the fondant decorations for the bag, the cake slid off my makeshift lazy Susan and flipped completely over on it's top.  Praise God that it landed on the table, it didn't break and I had extra icing to repair the damage!  If not, I would have had to make a new cake!  When all was said and done, I think it turned out really well.

I'll post some additional pictures at debssweetspot.blogspot.com.

Friday, April 15, 2011

Sarah's Easter Party Cupcakes

Sarah informed me yesterday at 3 p.m. that she was having a class party today and would like for me to bring something.  Grrr. Got to love those last minute requests!  But since she rarely has parties, I decided to go ahead and make it happen.  She requested a chocolate cake, but out of consideration for the teacher I decided to go with cupcakes.

In addition to that, I didn't want to do the normal chicken or egg cup cakes.  I wanted to do something that actually reflected the whole point of Easter.  Since time was limited, I had to modify my original design. 
Here is what I came up with late last night. Additional details and pictures are posted at debssweetspot.blogspot.com.

Saturday, April 9, 2011

Soccer Birthday Cake

My nephew had  birthday this weekend and I made him a special soccer cake. The figurine was my first gum paste person and although he needs improvement, the resulting person was better than I expected it to be! This is a yellow cake, covered in buttercream with fondant and gumpaste accents.

I've posted additional images at debssweetspot.blogspot.com.

Monday, April 4, 2011

Birthday/Anniversary Celebration Cake

Last month, Daniel, his sister and parents all celebrated birthdays.  In addition to that, is parents had an anniversary as well.  We had plans to do a cookout to celebrate then, but were unable. Yesterday we made up for that and had a wonderful cookout. I wanted to do a fun cake for the occasion. 

Originally I had planned to put daffodils on top of the cake instead of these daisy inspired flours.  But, Daniel volunteered to help with a play at the high school and then got ill all weekend.  Needless to say, I did not get to start the cake on time. But, I'm still mostly pleased with the results.  Next time I do a cake in this design, I'll make the flowers a bit larger.

I have additional photos posted at debssweetspot.com.

Monday, March 28, 2011

Deb's Sweet Spot

I've had a few people mention that I needed to have a separate site for my cakes and other sweet creations.  So I've done just that. You can stop by Deb's Sweet Spot and see some of my more recent cakes.  I'll be posting all that I make on there going forward.  I'll still link them to this site as well. 

Sunday, March 27, 2011

Princess Castle Cake

A friend Facebooked me with a cake request for her sweet daughter. Here are the pictures. The cake used the Wilton Romantic Castle set, It's buttercream with gumpaste flowers. The turret tops and other purple decorations are made of royal icing that has been coated in sparkling sugar. The top layer is a white cake with an oreo filling and the bottom is chocolate cake with a chocolate filling.


Tuesday, February 22, 2011

Time for Cakes

Many of my friends have asked a few questions about this whole cake baking thing that I partake in. 

Why do I do it? When Sarah was little, I decided that I wanted to be the one to make all her cakes. I don't know why.  For me, this was part of my present to her.  At first the cakes were simple iced cakes.  Those were before the digital age and I don't have a scanner to upload them here.

How do I have the time? The simple fact is that I make time to do this.  There is no other way around it.  When the kids were little, I would work mostly while they were in bed.  As they grew, they became my helpers or I found an activity that they enjoyed.  Ashton loves to bake.  He helps add flour and other ingredients to the bowl and then gets to lick the mixer paddle!  If he gets interested in the cake, I give him a little fondant to play with or he can decorate the leftover cake.  And I sometimes resort to letting the TV babysit.  And no, I don't care if you judge me for that!

Cake Genesis -  Originally all my cakes were out of the box and iced with container icing.  I happen to like Duncan Hines and don't mind using it!  The problem came when I started putting on more elaborate decorations.  For one of my early cakes, I added candy decorations as part of the theme.  They started falling off at the party!  I did some online research the next year and found ways to make the icing stronger. 

Food Network eventually began airing episodes that featured professional cake decorating.  That was when I became aware of fondant. I've tried making it from marshmallows and that was not a fun experience!  Currently I purchase the Wilton Fondant at Hobby Lobby or Michael's.  They always have 40-50% off coupons which brings the cost of a five pound box to around $10.  Fondant can be challenging to work with.  But with each cake, I've gotten better. In addition to that, YouTube and Google are great ways to find smart ways to do a plethora of decorating techniques.  The big thing that I'm still perfecting is how to get the fondant smooth on a cake.  On a good note, even when I screw it up, I usually have  decoration that can cover my imperfection!  On the Oliver cake, the scarf covered a whole lot of messed up fondant! 

I'm still not great at piping decorations.  Part of that is my lack of practice.  I currently have a good amount of icing left over from the Oliver cake. If I have time, I may practice with some of it.

Quick Tips

Level Your Cake - This can happen by cutting it down so that it's even.  I had an uneven oven for many years and had to make additional cakes to get enough level pieces to make a normal height cake.  Where there is a will, there is a way.  I've recently learned that if you take a metal flower spike (the thing you use to make a rose on) and place it upside down in the center of your cake pan, it will help your cake bake a little more evenly. There are other items on the market and people swear by different methods.  I tend to go the cheap, but effective route!

Food Coloring - Spend the extra money and get the food coloring at the craft store.  Either Wilton or Americolor work the best.  The liquid stuff does not work as well and can not be used in fondant.  Hobby Lobby just started selling the Americolor brand and I like it because it's squeezable. 

Character Cakes -  I love being able to buy little figurines for cakes.  I recently did a Toy Story cake for my son and we purchased figures to put on it.  In addition to looking great, he still plays with the figures. It's the easiest way to decorate a cake and your kids love it!

Ideas - Some things I just come up with myself, but others come from pictures online.  Sarah and Ashton like to research their birthday cakes and let me know which aspects of each cake they would like to have incorporated. For the younger kids, I pick the flavors.  Sarah is old enough to pick her own flavors now.  I've moved away from box cakes and have started trying different recipes on allrecipes.com or cakecentral.com.  I only use recipes that get great reviews and I always read a good amount of comments.  This lets me know if I need to make changes to the recipe before baking.

Smash Cakes - For first and second birthdays, I make a smash cake.  These cakes allow the little ones to make a huge mess while the adults enjoy the pretty cake.  The cakes are covered in icing. If I can't get the icing smooth, I use a star tip or a grass tip to make the sides look decorative and to cover the imperfections. 

I'll stop here, but would love to answer any questions you have.  Just message me on facebook or leave a comment here!

Oliver Cast Party Cake

My talented husband is currently playing Bill Sykes (from Oliver) at the local theatre.  Last weekend was the cast party and he signed me up to make the cake. The cake had to serve up to 50 people.  I looked on CakeCentral.com and found a pound cake recipe that made a generous sized cake.  I made 3 - one plain, one chocolate and one lemon flavored. Since it was a free cake, I decided the actors and their families could afford to be guinea pigs! 

It took me a little time to settle on a final design. In the end, I chose the top hat, as it's a main feature of a lot of the characters in the play and the books mirrored the set in the theatre.  I did a good amount of research on how to make the books. If you need some advise let me know.  There are not many tutorials or other resources out there on the web for closed book cakes.


 The hat was sort of modeled after the one Daniel wears.  His was brown with a green sash.  Since the brown would have clashed with my idea, I used a little artistic liscense!
 I just loved this in Black and White!
 The "gold" wrapped, chocolate coins represent the greed of the thieves.  They came from the dollar store.
 The lettering was hand painted with gold dust mixed with vodka.
 The cake board is 3/4" plywood covered in contact paper.  I then put some colored fondant over that.
 I wiped the black of the top hat with a damp paper towel.  I then took bronze dust and used a paper towel to brush it on the hat to give it a scruffy appearance.
I used a hot glue gun to put a piece of ribbon around the edge of the board. In hindsight, green would have looked nicer!
 The entire cake is covered in fondant.
The gold coins really added character. I'm so grateful we found them only hours before the cake was due!

The cake turned out to be a huge hit. Daniel told me that one person almost moved the cake because they thought it was a prop and it was in the way!  Thankfully someone was there to say something!  It's one of the best compliments that I received!